Hey there, fellow yarn lovers! Get ready to dive into a crochet project that’s as fun to make as it is to behold. Introducing our absolutely delightful (and perhaps a little bit spooky!) Two-Headed Crochet Bunny Amigurumi! This isn’t your average bunny – imagine a charming, plump little creature with two adorable heads, each with its own personality. Will yours be a sweet, pastel dream in soft blues and pinks for a kawaii vibe? Or perhaps a bolder, contrasting palette of black and neon green for a wonderfully creepy-cute look? The magic truly lies in the colors YOU choose!
This pattern is perfect for crocheters of all levels, especially those looking to dip their toes into amigurumi. It makes for an unforgettable handmade gift that’s sure to be cherished, or a unique piece of quirky home decor that’s guaranteed to spark conversation. We’ll guide you through each step with clear instructions, helping you master basic stitches and shaping techniques to bring your two-headed friend to life. Let’s get crafting and create something truly special!
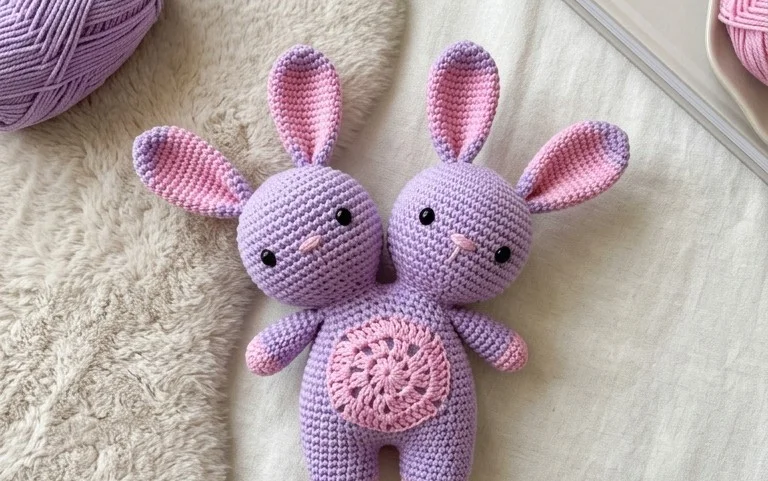
Creepy or Kawaii? This Two-Headed Crochet Bunny Amigurumi Is All About the Colors You Choose
There’s a delightful duality to the world of amigurumi, and this two-headed bunny pattern perfectly embodies that spirit. Depending on the yarn colors you select, this charming creature can swing from adorably sweet to wonderfully weird. Whether you’re aiming for a pastel-hued bundle of joy or a darkly gothic companion, this pattern offers a fantastic canvas for your creativity. Let’s dive into what makes this two-headed wonder so special and how you can bring your own unique version to life!
Getting Started: Yarn and Hook Recommendations
The magic of amigurumi often lies in the yarn and hook combination. For this two-headed bunny, we’re aiming for a fabric that’s dense enough to prevent stuffing from peeking through, while still being soft and huggable.
Yarn Choices
Worsted Weight Cotton Yarn: This is the gold standard for amigurumi. It’s durable, washable, and holds its shape beautifully. Brands like Lily Sugar ‘n Cream, Bernat Handicrafter, or Lion Brand 24/7 Cotton are excellent choices. The matte finish of cotton also allows the colors to really shine.
Acrylic Yarn: Many acrylic yarns also work wonderfully for amigurumi. They are often more affordable and come in a vast array of colors. Look for softer acrylics that don’t split easily. Red Heart Super Saver is a budget-friendly option, but for a softer feel, consider Caron Simply Soft or Paintbox Yarns Simply Aran.
Color Considerations: This is where the “creepy or kawaii” decision truly takes flight!
Kawaii Palette: Think soft pastels like baby pink, sky blue, mint green, and sunny yellow. You could even incorporate subtle gradients or color-changing yarns for an extra touch of sweetness.
Creepy Palette: Embrace darker, richer hues. Deep purples, black, charcoal grey, blood red, and even neon greens can create a wonderfully unsettling vibe. Consider contrasting colors for the two heads to add to the unique aesthetic.
Hook Size
The general rule of thumb for amigurumi is to use a hook size that’s a bit smaller than what’s recommended on the yarn label. This creates a tighter gauge, which is crucial for preventing gaps.
Typical Range: For worsted weight yarn, a 3.0mm (D/3) to 3.75mm (F/5) crochet hook is usually a good starting point.
Experimentation is Key: Your tension will play a significant role. It’s always a good idea to crochet a small swatch with your chosen yarn and hook to check for density. If you can see through it easily, go down a hook size. If it feels too stiff and hard to work with, try going up a hook size.
Mastering the Stitches: Essential Techniques
This two-headed bunny relies on a few fundamental crochet techniques that are common in amigurumi projects. Don’t be intimidated if you’re new to these; they’re surprisingly straightforward to learn!
Key Stitch Techniques
Magic Ring (or Magic Circle): This creates a perfectly closed foundation for your amigurumi pieces, ensuring no unwanted holes at the beginning of your rounds. There are plenty of video tutorials available that can demonstrate this technique visually, which is often the easiest way to grasp it.
Single Crochet (sc): The workhorse of amigurumi. It’s a dense stitch that builds the solid fabric we need.
Increase (inc): This is typically worked by making two single crochets in the same stitch. It’s how you expand your fabric to create rounded shapes.
Decrease (dec): This involves working two stitches together to create a smaller stitch. The most common method for amigurumi is the invisible decrease, where you work through the front loops only of the next two stitches. This creates a smoother, less noticeable decrease than a standard one.
Slip Stitch (sl st): Used for joining rounds and finishing off pieces.
Chain (ch): Used to start rows or create decorative elements.
Helpful Tips for Beginners
If you’re just starting out in the world of amigurumi, this pattern is a fantastic place to begin, but a few pointers can make the process even smoother.
Use a Stitch Marker: Amigurumi is worked in continuous rounds, meaning there’s no joining stitch at the end of each round. A stitch marker is indispensable for keeping track of where each round begins. Place it in the last stitch of your first round, and move it up as you complete each subsequent round.
Count Your Stitches: Consistency is key! Make sure you’re counting your stitches at the end of each round to ensure you haven’t accidentally added or skipped any. This will prevent your pieces from becoming wonky.
Stuffing Strategically: Don’t over-stuff your pieces too early. Start with a small amount of stuffing and gradually add more as you crochet. This allows you to shape the pieces evenly and avoid lumpy bits. Aim for firm but not rock-hard.
The Yarn Needle is Your Friend: When it comes to sewing the different parts of your amigurumi together, a yarn needle is essential. A blunt-tipped tapestry needle is ideal.
Patience is a Virtue: Amigurumi can take time, especially with multiple pieces. Don’t rush the process. Enjoy the journey of watching your creation come to life, stitch by stitch.
Making It Yours: Customization Galore!
The true beauty of this two-headed bunny pattern lies in its adaptability. It’s a blank canvas just waiting for your personal touch.
Color Play: Beyond Basic Hues
Two-Tone Heads: Dedicate one head to a light color and the other to a dark, or even use completely different color schemes for each. Imagine a cheerful yellow head next to a spooky purple one!
Stripes and Spots: Introduce stripes by changing colors every few rounds. You can also crochet on embroidered spots or even use a variegated yarn for a speckled effect.
Contrast Accents: Use a contrasting color for the ears, noses, or even the stitching for the eyes to make them pop.
Ombre Effect: If you’re feeling adventurous, you can create an ombre effect by gradually transitioning from one color to another.
Size Matters: From Mini to Mega
Smaller Scale: To create a mini version, simply use a finer weight yarn (like sport weight or fingering weight) and a smaller crochet hook (around 2.0mm to 2.5mm). The overall stitch count per round will naturally decrease, resulting in a smaller amigurumi.
Larger Scale: For a bigger, cuddlier bunny, opt for a bulkier yarn (like bulky or super bulky weight) and a corresponding larger hook (around 5.0mm to 6.5mm or even larger). You might also need to increase the number of stitches in some rounds to achieve the desired proportions. Always test your gauge with these larger sizes to ensure the fabric remains dense.
Caring for Your Creation: Keeping It Lovable
Once your two-headed bunny is complete, you’ll want to keep it looking its best.
Gentle Washing: For most cotton and acrylic yarns, spot cleaning is the preferred method for minor stains. For a more thorough clean, you can hand wash your amigurumi in cool water with a mild detergent. Gently squeeze out excess water without wringing.
Air Dry is Best: Never put your amigurumi in a dryer, as the heat can cause it to lose its shape or melt synthetic fibers. Lay it flat on a clean towel in a well-ventilated area to air dry completely.
Reshaping: If your amigurumi loses its shape a bit after washing, gently reshape it while it’s still damp.
Safety Eyes: If you’ve used safety eyes, ensure they are securely fastened. If the amigurumi is intended for very young children, consider embroidering the eyes instead to avoid any choking hazards.
Project Ideas: Beyond a Standalone Buddy
This two-headed bunny is a fantastic standalone amigurumi, but its unique nature opens up a world of creative possibilities.
Keychain Charms: Make smaller versions and attach them to keychains or zippers for a fun, quirky accessory.
Themed Decor: Create a collection of these bunnies in different color palettes for holiday decor. Imagine a Halloween-themed set with black and orange, or a pastel Easter set.
Gifts with a Twist: This is a truly unique gift that’s sure to be a conversation starter. Customize the colors to match the recipient’s personality or interests.
Part of a Larger Scene: Use them as characters in a larger crocheted display or diorama.
Embroidered Expressions: Experiment with different embroidery stitches and thread colors to give each head a distinct personality. One could have a wide, innocent grin, while the other sports a mischievous smirk.
This two-headed crochet bunny amigurumi is more than just a craft project; it’s an exploration of color and character. Whether you lean towards the sweet and cuddly or the delightfully spooky, the power is in your hands – and your yarn stash! So, grab your hook, pick your colors, and let your imagination run wild with this wonderfully versatile pattern. Happy crocheting!
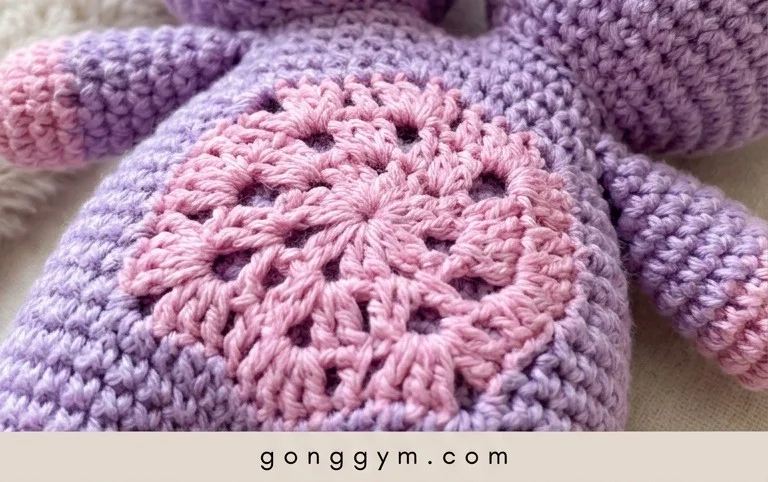
And there you have it! Whether you’ve opted for a spooky, spectral palette or a burst of vibrant, cheerful hues, your two-headed crochet bunny amigurumi is ready to capture hearts (or perhaps playfully spook them!). We hope you’ve had a delightful time bringing this unique creation to life. Don’t be shy – we’d absolutely love to see your finished bunnies! Tag us on social media using #TwoHeadedBunnyCrochet so we can admire your color choices and crafty skills.
Feeling inspired to get creative? Consider experimenting with different yarn textures, adding unique embellishments like googly eyes or little bows, or even giving each head a distinct personality with contrasting colors. The possibilities are endless! If you enjoyed this pattern, be sure to explore our other crochet adventures for more fun and quirky projects to add to your collection.