Hello, fellow yarn lovers! Get ready to embrace the cozy vibes because we’re diving into the delightful world of crochet with a pattern that’s sure to warm your heart – the Crochet Pumpkin Hat! Imagine a charming, plump pumpkin, perfectly shaped and topped with a cute little stem, all crocheted with love. It’s the ultimate fall accessory that’s as fun to make as it is to wear!
Whether you’re a crochet newbie looking for a rewarding first project or a seasoned crafter seeking to add a touch of handmade magic to your home decor, this pattern is for you. These adorable hats make the sweetest gifts for little ones, darling additions to your seasonal decor, or even a fun photo prop for those autumn snapshots. We’ll guide you step-by-step, covering everything from basic stitches to creating that perfect pumpkin shape. Let’s get hooking and craft some seasonal cheer!

Cozy Up with a Crochet Pumpkin Hat: A Pattern for Every Trick-or-Treater (and Beyond!)
There’s something undeniably charming about a crocheted pumpkin hat. It’s the perfect blend of cozy and cute, a whimsical accessory that instantly brings a smile to anyone’s face. Whether you’re planning for Halloween, a fall photoshoot, or just want to add a touch of autumnal cheer to your little one’s wardrobe, this versatile crochet pumpkin hat pattern is designed to be your go-to. And the best part? It’s crafted to fit everyone, from the tiniest newborn to the most enthusiastic adult! Let’s dive into how you can create your very own stash of pumpkin perfection.
Yarn & Hook: The Foundation of Your Pumpkin Patch
Choosing the right yarn and hook is crucial for any crochet project, and our pumpkin hat is no exception. For a classic pumpkin look, we’ll be focusing on yarns that offer good stitch definition and a pleasing texture.
Yarn Recommendations:
The beauty of this pattern is its adaptability. While a worsted-weight yarn is the standard, don’t be afraid to experiment!
Worsted-Weight Acrylic Yarn: This is your workhorse yarn for this project. It’s readily available, comes in a vast array of colors, is durable, and easy to care for. For a vibrant pumpkin, opt for a rich orange. Cream or white is perfect for the stem, and a deep brown or even a mossy green can add a unique touch to variations. Brands like Red Heart Super Saver, Lion Brand Vanna’s Choice, or Caron One Pound are excellent choices.
Bulky Weight Yarn: If you’re looking for a quicker project or a super chunky, cozy hat, consider a bulky weight yarn. This will create a more substantial hat and will work up significantly faster. Just remember to adjust your hook size accordingly.
Cotton Blends: For a hat that’s a bit lighter and breathable, a cotton blend can be a great option, especially for warmer climates or those who tend to overheat. However, acrylic is generally preferred for its elasticity and ease of care in hats.
Hook Size: Finding the Right Fit
The hook size is directly related to your yarn weight. Always check the yarn label for recommended hook sizes, but here’s a general guideline:
For Worsted-Weight Yarn: A G/6 (4.0 mm) or H/8 (5.0 mm) crochet hook is usually a good starting point. The exact size might vary slightly depending on your individual crochet tension. You want your stitches to be snug enough to create a solid fabric that won’t have large holes, but not so tight that the hat becomes stiff or uncomfortable.
For Bulky Weight Yarn: You’ll likely need a larger hook, such as an I/9 (5.5 mm) or J/10 (6.0 mm) hook.
Tip for Beginners: It’s a good idea to always crochet a small swatch with your chosen yarn and hook before starting the hat. This allows you to check your tension and ensure you’re achieving the desired fabric. If your swatch looks too loose, go down a hook size. If it’s too tight, go up a hook size.
Mastering the Stitches: Your Crochet Toolkit
This pumpkin hat pattern primarily relies on a few fundamental crochet stitches that are perfect for beginners to practice and for experienced crocheters to whip up quickly.
Key Stitch Techniques Used:
Magic Ring (or Magic Circle): This is a common technique for starting projects worked in the round, creating a tight center with no holes. It’s a little fiddly at first, but once you get the hang of it, it’s invaluable!
Single Crochet (sc): This is the most basic crochet stitch. It creates a dense and sturdy fabric, perfect for hats.
Half Double Crochet (hdc): This stitch is taller than a single crochet and creates a slightly looser, more flexible fabric. It’s often used for the main body of the hat to give it a nice drape.
Double Crochet (dc): While not always used in the main body, double crochet is fantastic for adding height and is often used in the stem or for decorative elements.
Slip Stitch (sl st): Used for joining rounds, creating smooth transitions, and sometimes for decorative edging.
Increase (inc): To make your hat grow in circumference, you’ll be working two stitches into the same stitch from the previous round. This is typically done in single crochet or half double crochet for this pattern.
Invisible Decrease (inv dec): This is a neat way to decrease stitches that blends seamlessly into the fabric, avoiding unsightly gaps. It involves working a single crochet into the front loops of two stitches.
For the Absolute Beginner: Don’t be intimidated by the terms! Many excellent video tutorials are available online for each of these stitches. Watching someone demonstrate them can make a world of difference. Start by practicing each stitch on a small swatch until you feel comfortable.
Tips for a Smoother Crocheting Journey
Even with a straightforward pattern, a few helpful tips can make your experience even more enjoyable and result in a polished finish.
Tips for Beginners:
Read the Entire Pattern First: Before you even pick up your hook, read through the entire pattern to get a general understanding of the steps involved.
Use a Stitch Marker: Place a stitch marker in the first stitch of each round. This is a lifesaver for keeping track of where each round begins, especially when working in continuous rounds.
Count Your Stitches: Regularly count your stitches at the end of each round. This is the most effective way to catch mistakes early and prevent your hat from ending up too small or too large.
Consistent Tension: Try to maintain consistent tension throughout your work. This means holding your yarn and hook in a similar way with each stitch.
Weave in Ends Securely: When you finish off your yarn, take the time to weave in your ends thoroughly. This prevents them from unraveling later and ensures your hat looks neat and tidy.
Don’t Be Afraid to Frogging: “Frogging” is crocheting slang for ripping out stitches. If you realize you’ve made a mistake, it’s much better to gently pull out a few stitches and correct it than to power through and have a wonky hat.
Making it Your Own: Customization Station
One of the best things about crochet is the endless potential for personalization. This pumpkin hat pattern is a fantastic canvas for your creativity!
Customizing Your Pumpkin Hat:
Colors: While orange is classic, imagine a “gourmet” pumpkin in shades of cream, pale yellow, or even a deep burgundy! You can also change colors for stripes or create a two-toned effect. For the stem, experiment with different shades of brown or green.
Size Adjustments: The pattern provides sizes for everyone, but if you find you need a slightly larger or smaller hat, it’s often as simple as adding or omitting a few increase rounds. Always measure the circumference of the intended wearer’s head and compare it to the hat’s measurements at various stages of completion.
Adding Features:
Face Details: For a spooky or friendly jack-o’-lantern, you can embroider or crochet simple face shapes (eyes, nose, mouth) using black yarn.
Leaf or Vine Embellishments: Crochet a small leaf or a curly vine and stitch it onto the side of the hat for an extra touch of fall flair.
Pom-Pom or Tassel: Top your hat with a fluffy pom-pom or a coordinating tassel for a fun finishing touch.
Ribbed Brim: For a more structured brim, you can add a few rounds of ribbing (alternating front post and back post stitches) before starting the main body of the hat.
Caring for Your Cozy Creation
To ensure your beautiful crochet pumpkin hat lasts for many seasons of wear and smiles, proper care is essential.
Care Instructions:
Washing: Most acrylic yarns are machine washable and dryable. Check your yarn label for specific instructions. Generally, a gentle cycle with cold or warm water is recommended.
Drying: Lay the hat flat to dry or tumble dry on low heat. Avoid high heat, as it can cause acrylic yarn to melt or lose its shape.
Blocking (Optional): For a perfectly shaped hat, you can block it after washing. Gently shape the hat to its desired dimensions while damp and allow it to air dry completely. You can use blocking mats or even pin it onto a firm surface.
Spot Cleaning: For minor spills, you can often spot clean with a damp cloth and mild soap.
Beyond the Hat: Project Ideas and Inspiration
Once you’ve mastered the crochet pumpkin hat, the possibilities for pumpkin-themed crochet projects are vast!
Project Ideas:
Pumpkin Garland: String together mini pumpkin hats or individual pumpkin motifs to create a charming fall garland.
Pumpkin Coasters: Small crocheted pumpkins make adorable and functional coasters for your autumn drinks.
Pumpkin Dishcloths: Use a textured stitch pattern to create reusable dishcloths that bring a touch of seasonal cheer to your kitchen.
Pumpkin Amigurumi: Create small, stuffed pumpkin toys perfect for little hands or as decorative accents.
Pumpkin-Themed Baby Booties: Complement the hat with matching pumpkin booties for an utterly adorable baby set.
Seasonal Decor: Crocheted pumpkins of various sizes can be used to decorate shelves, mantels, or centerpieces.
So, grab your yarn, your hook, and get ready to create a delightful crochet pumpkin hat that will be cherished for years to come. It’s a project that’s as joyful to make as it is to wear!
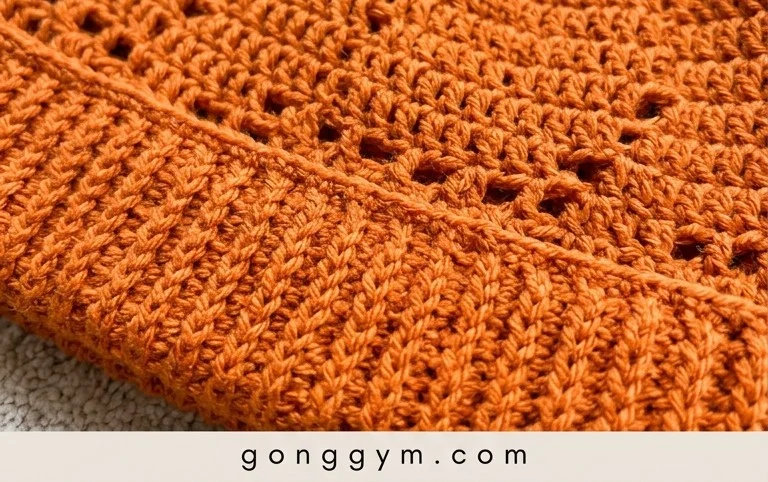
And there you have it – your very own adorable crochet pumpkin hat, ready for any little (or big!) head in all the sizes! We hope you’ve enjoyed this pattern as much as we have. Don’t be shy, grab your yarn and hook and give it a try! We can’t wait to see your finished creations. Share your adorable pumpkin hats on social media using #CrochetPumpkinHat and tag us – it always brightens our day to see them!
Feeling inspired? Consider adding a cute stem, a little leaf, or even some embroidered features for a unique touch. The possibilities are endless! If you’ve loved this pattern, be sure to explore our site for even more delightful crochet projects to cozy up with. Happy crocheting!